ADVERTISEMENT
Absolutely! Here’s a comprehensive **3,000-word article** titled:
—
# **Thirty Years of Dirt Coming Off the Kitchen Floor and Grout—What a Difference! So Many of You Asked About the Cleaning Solution, So Here’s What I Used. Don’t Lose It!**
After years—*decades* even—of daily foot traffic, spills, pet messes, and kitchen chaos, it’s easy to accept that your tile floors and grout just won’t ever look clean again. I used to believe that too. Until one day, I decided to take on the dirt that had built up over thirty years. What happened next shocked even me: **thirty years of grime lifted right before my eyes**, and the floor looked brand new.
So many of you saw the before-and-after and asked: **What did I use? What’s the secret recipe? How did I do it?**
This article gives you **every detail**. From the homemade solution I used, the method, tools, and tips—**don’t lose this guide**, because it will save you hundreds of dollars on professional deep cleans and restore your tile and grout beyond your expectations.
—
## **Why Grout Gets So Dirty (and Stays That Way)**
Grout is porous. That means it absorbs dirt, grease, and liquids over time, especially in kitchens where spills and moisture are common. Even if you mop regularly, dirty mop water often settles into the grout, making it darker over time. That gray, stained appearance becomes “normal” — until you realize it can actually be cleaned.
Over the years, regular mopping, kitchen grease, and just life in general turned my light-colored grout dark brown. The tiles, once off-white, looked permanently dusty. I thought I’d need to regrout or replace the tiles. But I was wrong.
—
## **The 5-Ingredient Miracle Grout Cleaner**
Let’s jump straight into the **cleaning solution** that transformed my floors. You probably have most of these ingredients already at home.
### **You Will Need:**
1. **½ cup baking soda** – a natural abrasive and deodorizer.
2. **¼ cup hydrogen peroxide (3%)** – disinfects and lifts stains.
3. **1 teaspoon dish soap** – breaks down grease.
4. **Optional: 10 drops of essential oil** (tea tree, lemon, or eucalyptus for scent & natural antibacterial properties).
5. **Optional: White vinegar for post-clean rinse (not used in solution mix)**.
> *Note:* Do not mix vinegar directly into this solution. Vinegar can react with baking soda, neutralizing its scrubbing power.
—
## **How to Mix the Solution**
In a small bowl or squeeze bottle:
1. Combine the **baking soda** and **hydrogen peroxide** first.
2. Stir gently until a paste forms.
3. Add the **dish soap** and mix well.
4. Add essential oil, if using.
5. Pour the mixture into a squeeze bottle or apply directly using a sponge.
—
## **Step-by-Step Cleaning Method**
Cleaning thirty years of dirt isn’t just about having the right mix. **Technique matters too.** Here’s the **exact method** I followed, step by step:
—
### **1. Clear the Area**
Remove rugs, chairs, pet bowls, or anything else sitting on your floor. Sweep or vacuum thoroughly. You want to start with a clean surface, free from dust and debris.
—
### **2. Apply the Solution Generously**
Squeeze or spoon the mixture directly onto the grout lines. If you’re cleaning tiles as well, you can spread a thin layer over the surface using a sponge or soft brush.
Let the solution sit for **10–15 minutes**. This gives it time to break down years of grime.
—
### **3. Scrub with a Stiff Brush**
Use a **grout brush**, old **toothbrush**, or a **medium-stiff bristle cleaning brush**. Scrub in a circular motion for tile, and back-and-forth in the direction of the grout lines. You should see the dirt lifting almost immediately.
> Tip: You can also use a drill brush attachment to save time and effort on large areas.
—
### **4. Wipe or Mop Away the Grime**
Use a damp microfiber cloth or sponge to wipe the dirty paste off the floor. Rinse the cloth often. You’ll be shocked by the color of the water!
—
### **5. Do a Final Vinegar Rinse (Optional)**
Fill a spray bottle with equal parts **white vinegar and warm water**. Lightly spray the tile and grout, and do a final wipe-down or mop. This removes any soap residue and adds natural shine.
> Warning: Don’t use vinegar on natural stone tiles like marble or travertine, as it can damage the surface.
—
### **6. Let Dry and Admire**
Let the area air dry or use an old towel to speed it up. Stand back and prepare to be amazed. The color of the grout may surprise you—it probably hasn’t looked this good since installation.
—
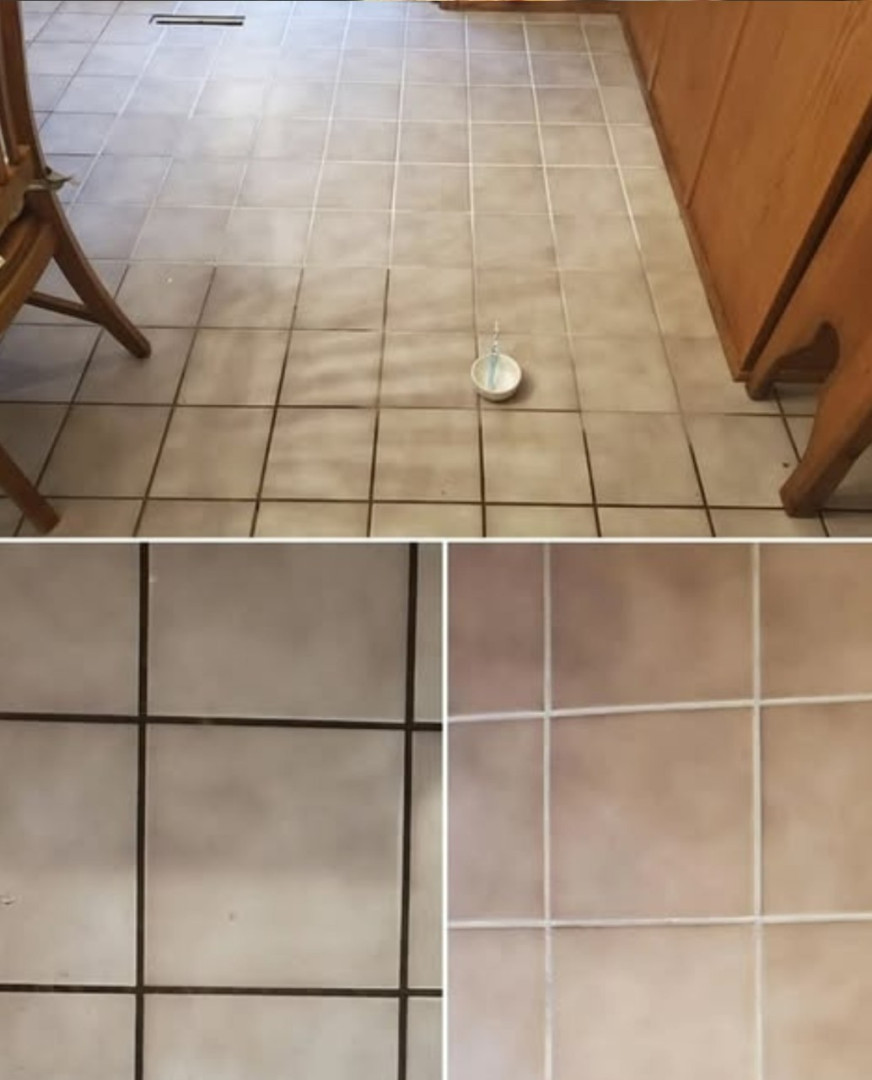
## **Before-and-After: My Personal Results**
I cleaned just a small 3 ft x 3 ft section first—and the transformation was so dramatic I had to take photos. The grout had gone from dark gray to its original creamy color. The tiles had a shine I forgot was even possible.
Encouraged, I did the entire kitchen in sections. Yes, it took a few hours. But the payoff? **Stunning.** No need for a professional deep clean or grout reapplication.
—
## **Why This Works: A Breakdown of the Ingredients**
Let’s explore *why* this solution is so effective:
* **Baking Soda:** Gently abrasive, lifts dirt from porous surfaces like grout without scratching.
* **Hydrogen Peroxide:** Naturally bleaches stains and kills bacteria. Especially useful for kitchen bacteria buildup.
* **Dish Soap:** Cuts grease and makes grime easier to lift.
* **Essential Oils (Optional):** Provide a fresh scent and have natural anti-microbial properties.
For Complete Cooking STEPS Please Head On Over To Next Page Or Open button (>) and don’t forget to SHARE with your Facebook friends
