ADVERTISEMENT
Absolutely! Here’s a detailed, engaging 3000-word article on **Clara’s Küche – Banana Pudding Cheesecake Cones**. This article will cover the recipe, step-by-step instructions, tips for perfecting it, background on the flavors, variations, and serving ideas. Let’s dive in!
—
# Clara’s Küche – Banana Pudding Cheesecake Cones: A Delightful Twist on Classic Desserts
Banana pudding and cheesecake are two timeless desserts beloved by many. Clara’s Küche combines these favorites into one unique and visually appealing treat: **Banana Pudding Cheesecake Cones**. This innovative recipe elevates the creamy, fruity flavors of banana pudding and rich cheesecake, all served in a fun, portable cone format that’s perfect for parties, summer gatherings, or anytime you want a sweet indulgence.
In this article, we’ll explore everything you need to know to make these delicious banana pudding cheesecake cones from scratch — from the ingredients to the preparation, presentation, and tips for success. We’ll also cover the history and flavor profile of banana pudding and cheesecake, why the cone shape works so well, and some creative variations you might enjoy.
—
## The Magic of Banana Pudding and Cheesecake
### What Makes Banana Pudding So Special?
Banana pudding is a classic Southern dessert, often made with layers of vanilla wafers, sliced bananas, and creamy vanilla pudding. It’s comfort food at its finest — simple, nostalgic, and bursting with flavor. The natural sweetness of ripe bananas pairs perfectly with the smooth, vanilla-infused pudding and crunchy wafers, creating a satisfying mix of textures and tastes.
### Cheesecake: The Creamy Dream
Cheesecake, on the other hand, is a rich, dense dessert made primarily from cream cheese, sugar, eggs, and a crust (often graham cracker). Its smooth, velvety texture and tangy sweetness make it a favorite worldwide. When combined with banana pudding, cheesecake adds a luxurious depth that elevates the dessert to a whole new level.
—
## Why Serve Cheesecake in a Cone?
Traditional desserts are usually served on plates or in bowls. But presenting cheesecake and banana pudding in cones adds an element of fun and novelty. Here are some reasons why this format shines:
* **Portability:** Perfect for outdoor parties and picnics, cones let guests enjoy dessert without utensils.
* **Visual Appeal:** The layered look of banana pudding and cheesecake in a cone is inviting and eye-catching.
* **Portion Control:** Cones offer individual servings, helping manage portion sizes.
* **Crunch Factor:** The cone adds a crispy texture that contrasts wonderfully with creamy filling.
—
## Clara’s Küche – Banana Pudding Cheesecake Cones Recipe
### Ingredients
#### For the Cheesecake Filling:
* 16 oz (450g) cream cheese, softened
* 1/2 cup granulated sugar
* 1 teaspoon vanilla extract
* 1 cup heavy whipping cream, whipped to soft peaks
* 1 tablespoon lemon juice (optional, for tang)
#### For the Banana Pudding Layer:
* 1 package (3.4 oz) instant vanilla pudding mix
* 2 cups cold milk
* 2 ripe bananas, sliced
#### For the Cones and Toppings:
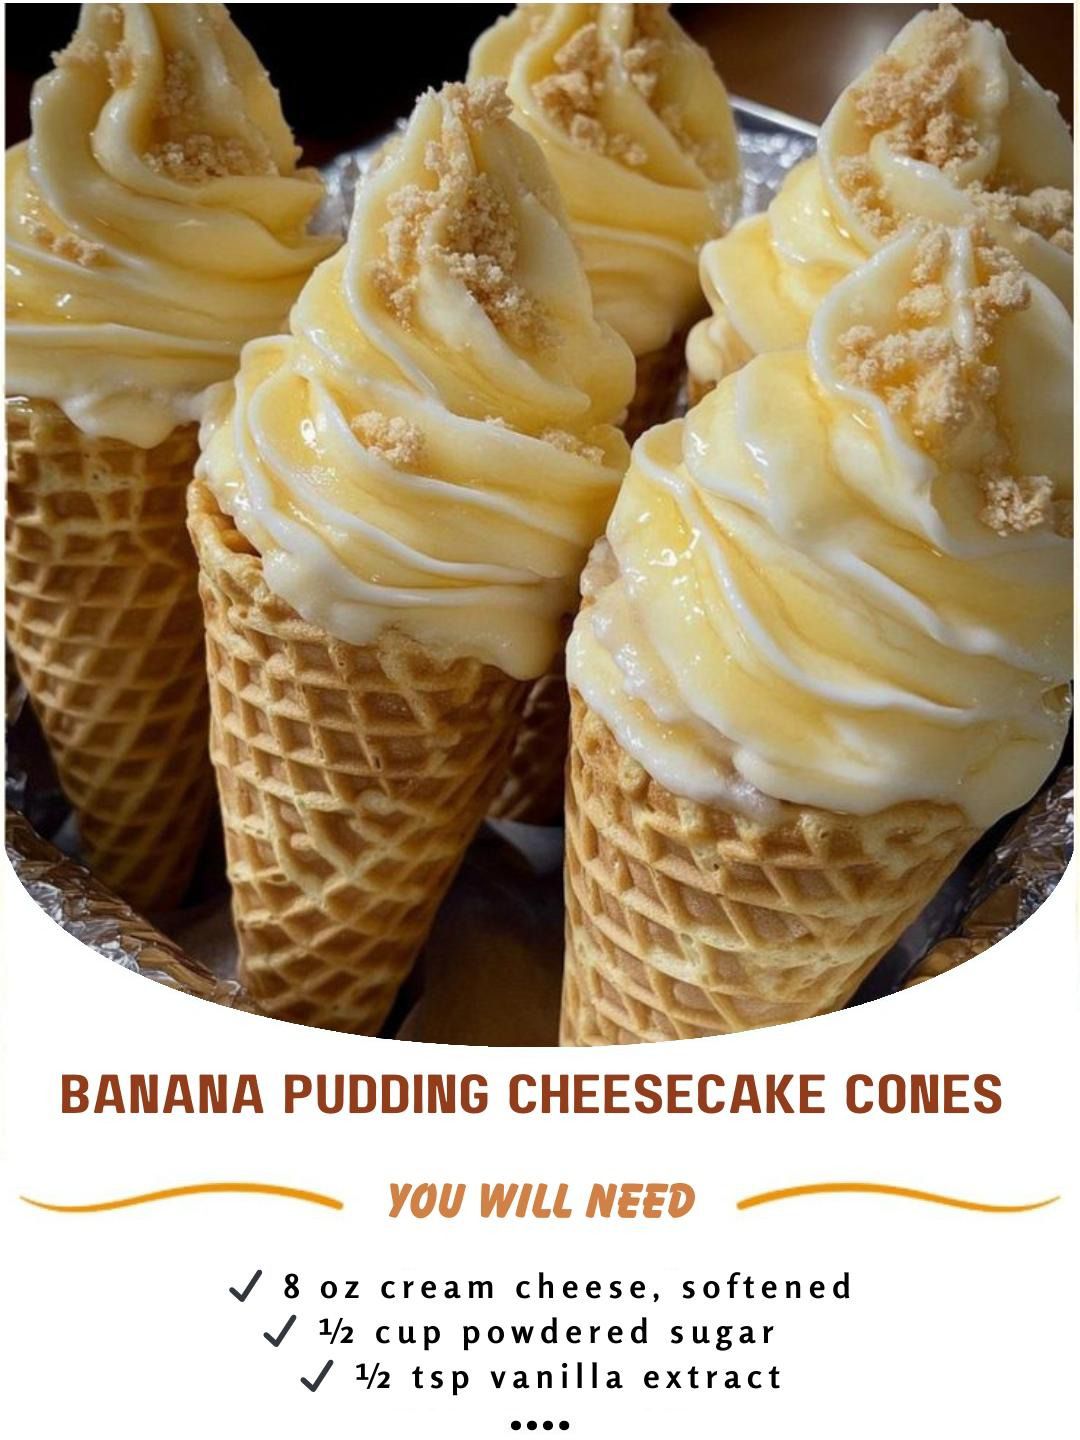
* 8 waffle cones (store-bought or homemade)
* Vanilla wafers or crushed graham crackers
* Whipped cream (optional)
* Fresh banana slices for garnish
* Caramel or chocolate drizzle (optional)
* Chopped nuts or sprinkles (optional)
—
### Step-by-Step Instructions
#### 1. Prepare the Cheesecake Filling
* In a large mixing bowl, beat the softened cream cheese with granulated sugar until smooth and creamy.
* Add vanilla extract and lemon juice, if using, and mix well.
* Gently fold in the whipped cream, being careful not to deflate it, to create a light and fluffy cheesecake filling.
#### 2. Make the Banana Pudding
* In a separate bowl, whisk the instant pudding mix with cold milk until thickened (about 2 minutes).
* Let it set in the refrigerator for 5-10 minutes to firm up slightly.
#### 3. Assemble the Cones
* Take a waffle cone and add a spoonful of crushed vanilla wafers or graham crackers at the bottom.
* Layer some banana slices inside the cone.
* Add a layer of banana pudding.
* Follow with a generous layer of the cheesecake filling.
* Repeat layering if the cone is tall enough, finishing with cheesecake on top.
#### 4. Garnish
* Top each cone with a dollop of whipped cream.
* Add a slice of banana, a sprinkle of crushed wafers or nuts, and drizzle with caramel or chocolate sauce if desired.
#### 5. Serve Immediately or Chill
* These cones are best served fresh but can be refrigerated for up to 2 hours before serving.
* If you refrigerate, cover them loosely with plastic wrap to prevent the cones from getting soggy.
—
## Tips for Perfect Banana Pudding Cheesecake Cones
* **Use Fresh Bananas:** Overripe bananas may become mushy and affect texture. Choose ripe but firm bananas.
* **Whip Cream Just Right:** Whip the cream to soft peaks, not stiff peaks, for the best fold-in texture.
* **Chill the Filling:** Keeping the cheesecake filling and pudding chilled before assembly helps maintain firmness.
* **Prevent Sogginess:** Add crushed wafers or graham crackers at the bottom and between layers to soak up excess moisture.
* **Serve Quickly:** Because of the moisture from the pudding and bananas, cones can get soggy if left out too long.
—
## Making Waffle Cones at Home
If you want to get creative, homemade waffle cones add an extra touch of love:
### Ingredients for Waffle Cones:
* 2 large eggs
* 1/2 cup granulated sugar
* 1/4 cup unsalted butter, melted
* 1/2 cup all-purpose flour
* 1/4 teaspoon salt
* 1/2 teaspoon vanilla extract
### Instructions:
1. Preheat your waffle cone maker or use a pizzelle iron.
2. Whisk eggs and sugar until pale and fluffy.
3. Add melted butter and vanilla; mix well.
4. Fold in flour and salt gently until combined.
5. Spoon batter onto waffle maker and cook for 1-2 minutes until golden.
6. Quickly roll the hot waffle into a cone shape using a cone roller or a sturdy cone-shaped object.
7. Let cool completely.
Homemade cones taste fresher and can be customized with cinnamon or cocoa powder for extra flavor.
For Complete Cooking STEPS Please Head On Over To Next Page Or Open button (>) and don’t forget to SHARE with your Facebook friends
